Project Date: June 2020
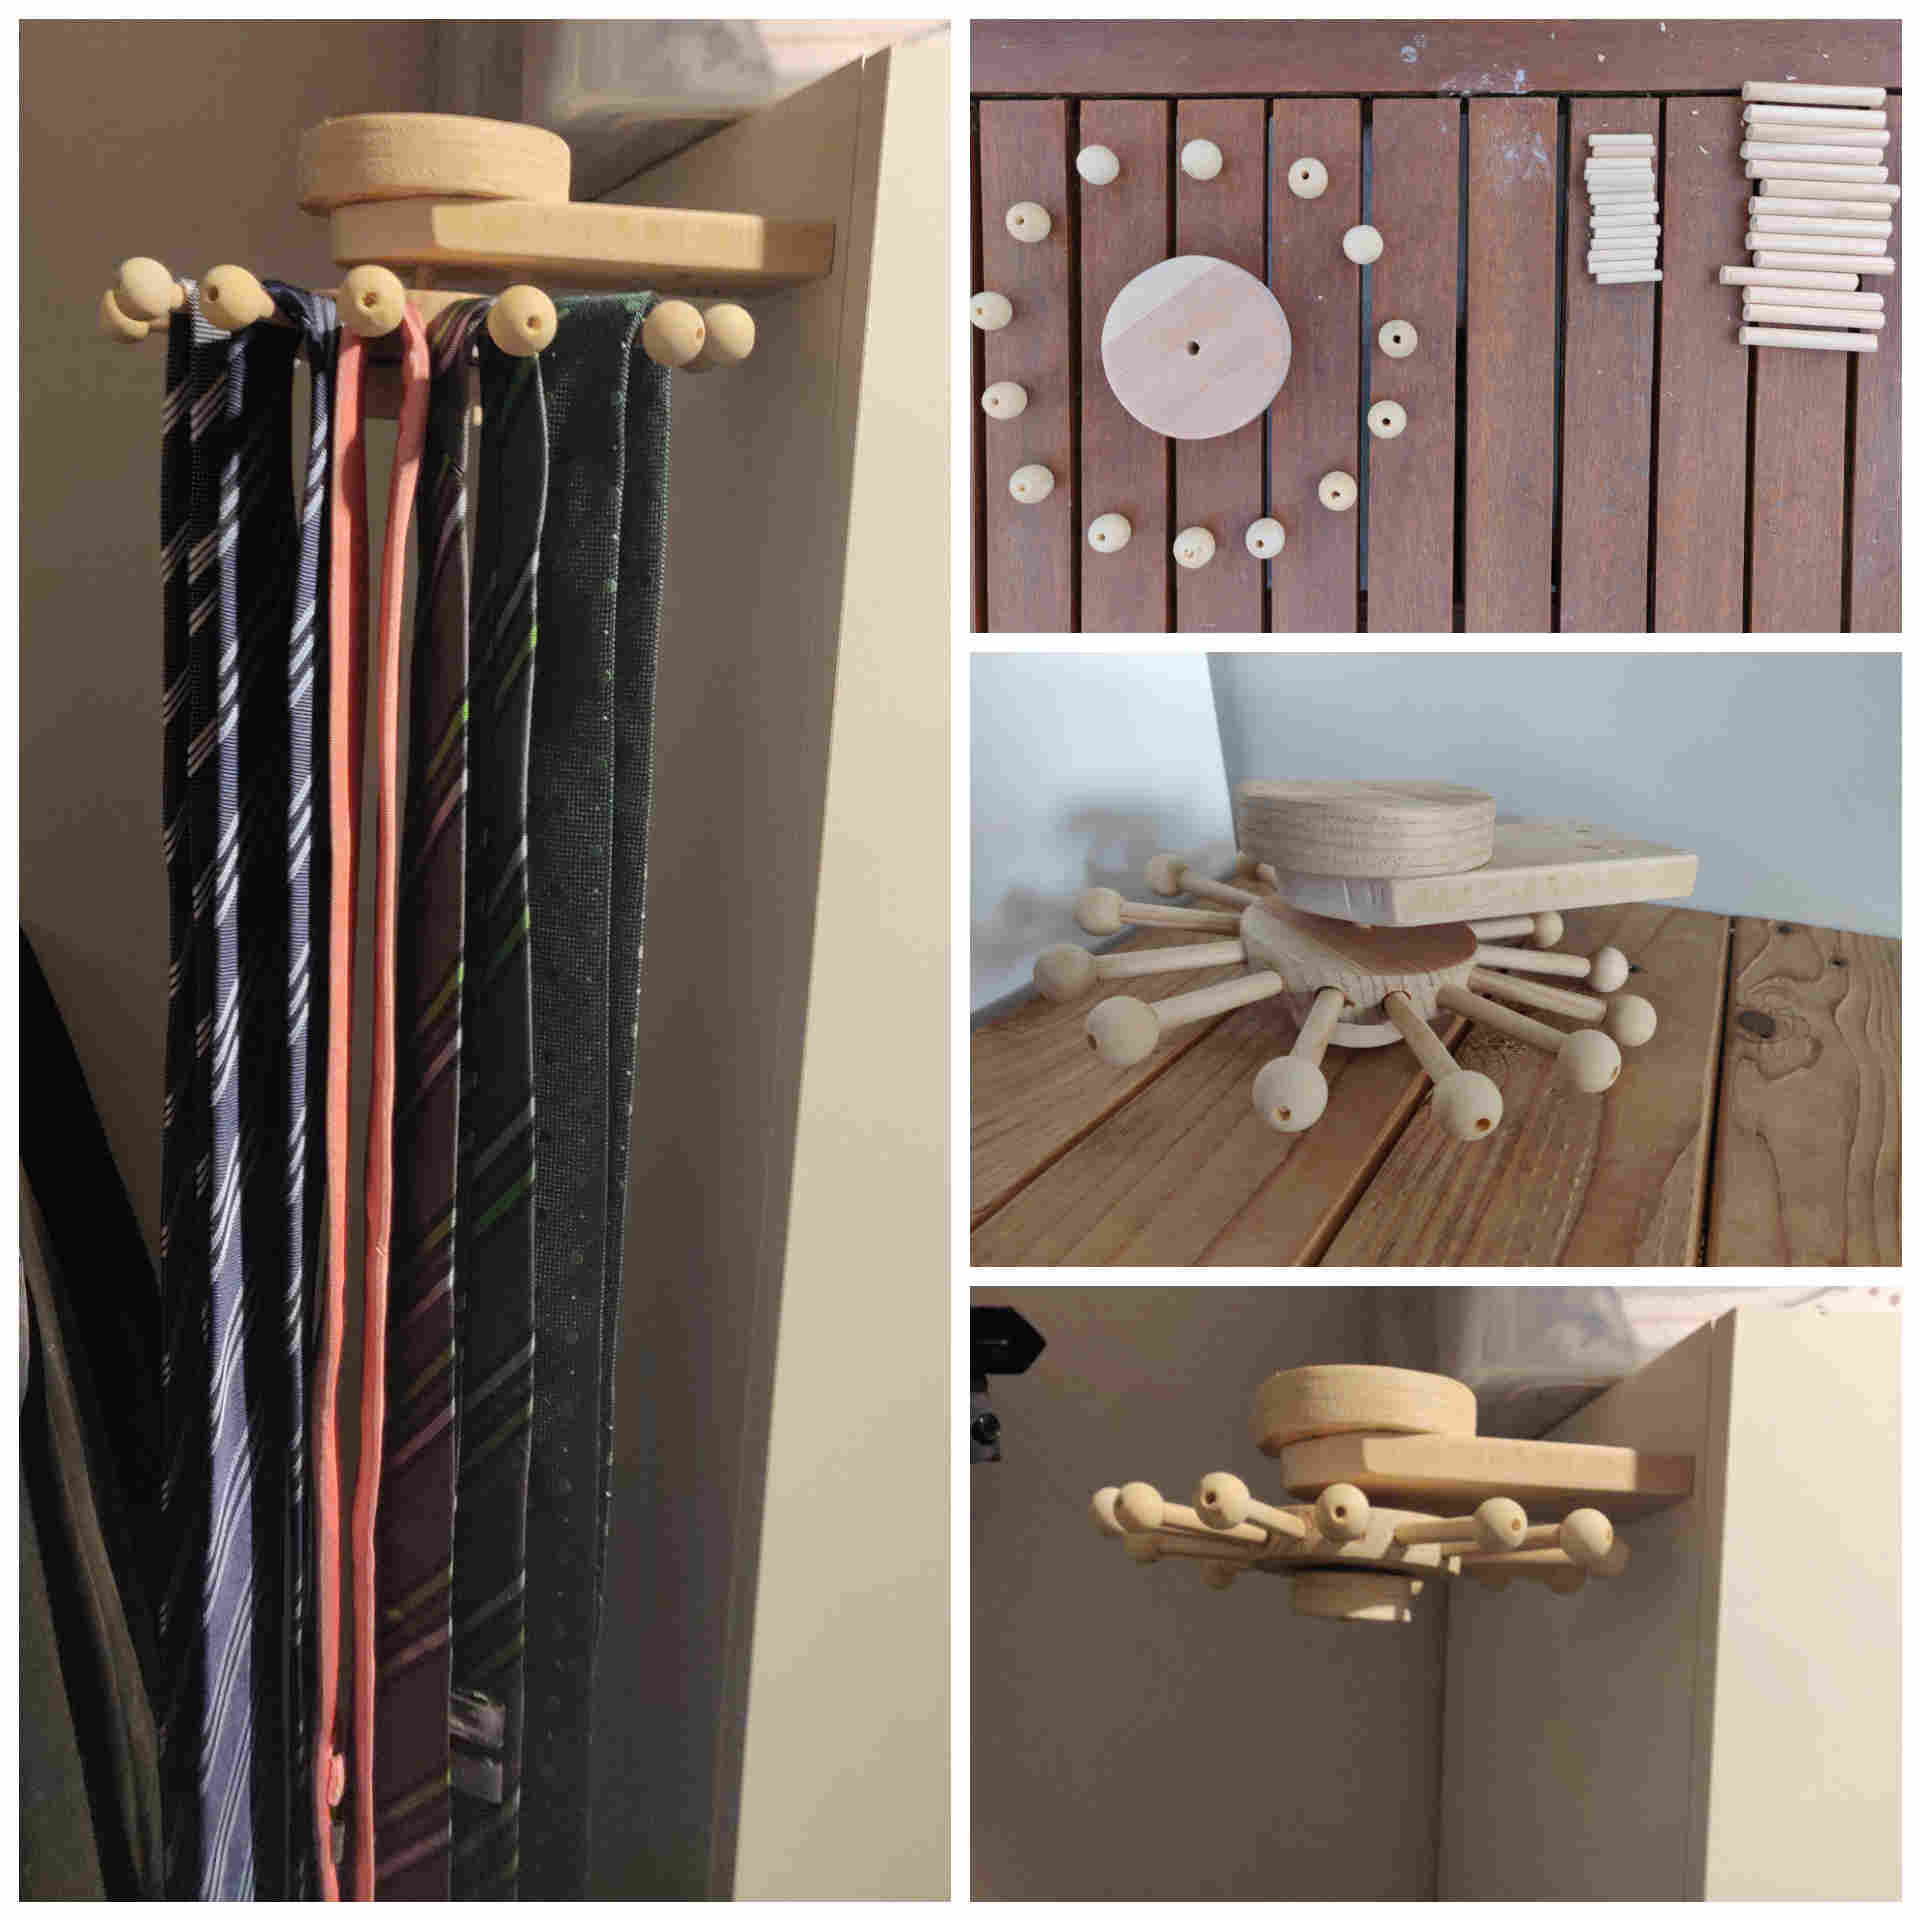
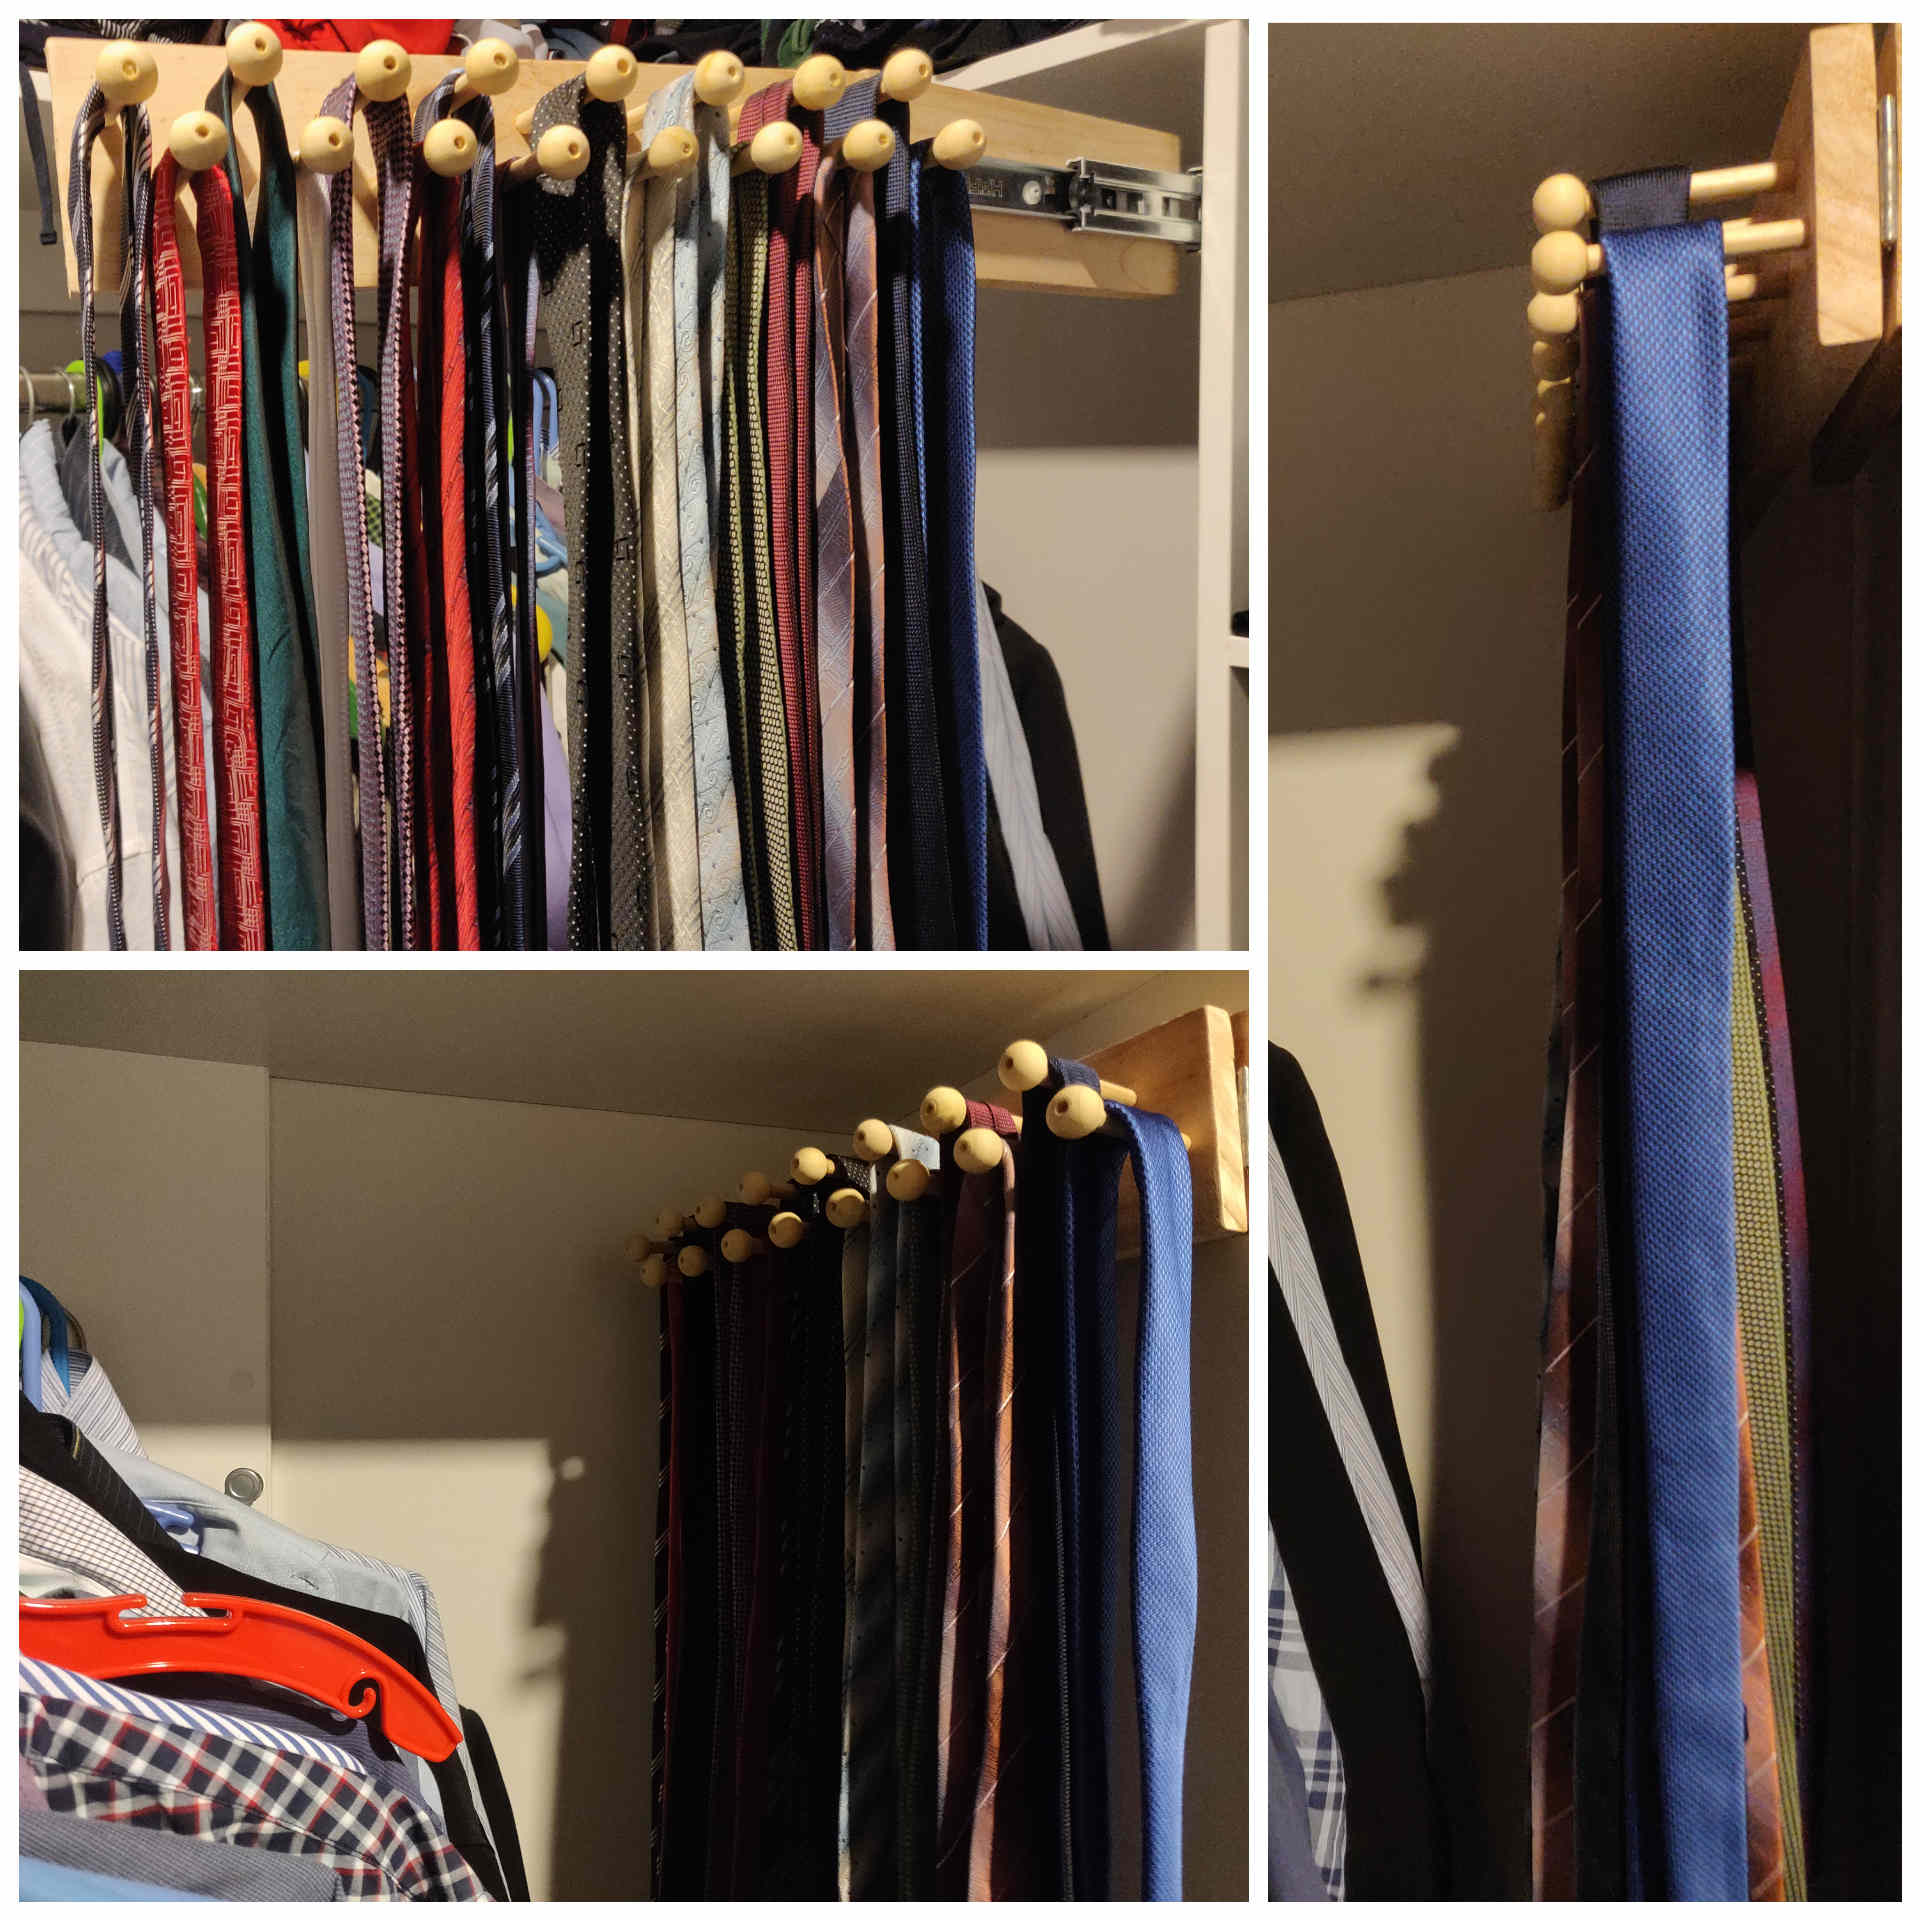
My ties were just draped over the clothes rail in the walk in wardrobe in a big mess that made it hard to grab a tie without causing most of the others to fall off. I decided that what I needed was a tie rack; and it had to be custom made to fit in an available space that couldn’t be used for anything else. I wanted it to take up minimal space when stored away, but with the ability to access the ties with ease. I looked on Pinterest for ideas, and saw many different types of tie storage options. I settled on a design of a slide out rack with wooden pegs forming two rows to drape the ties. Due to the orientation of the walk in wardrobe, when stored away, the ties face towards the clothes rail; the rack needs to slide out and then swing around.
Construction materials:
- Plank of pallet wood cut into two pieces
- Hinge
- Ball bearing runner
- 8 mm diameter wooden dowel rod
- smaller diameter wooden dowel rod
- wooden beads
- various screws
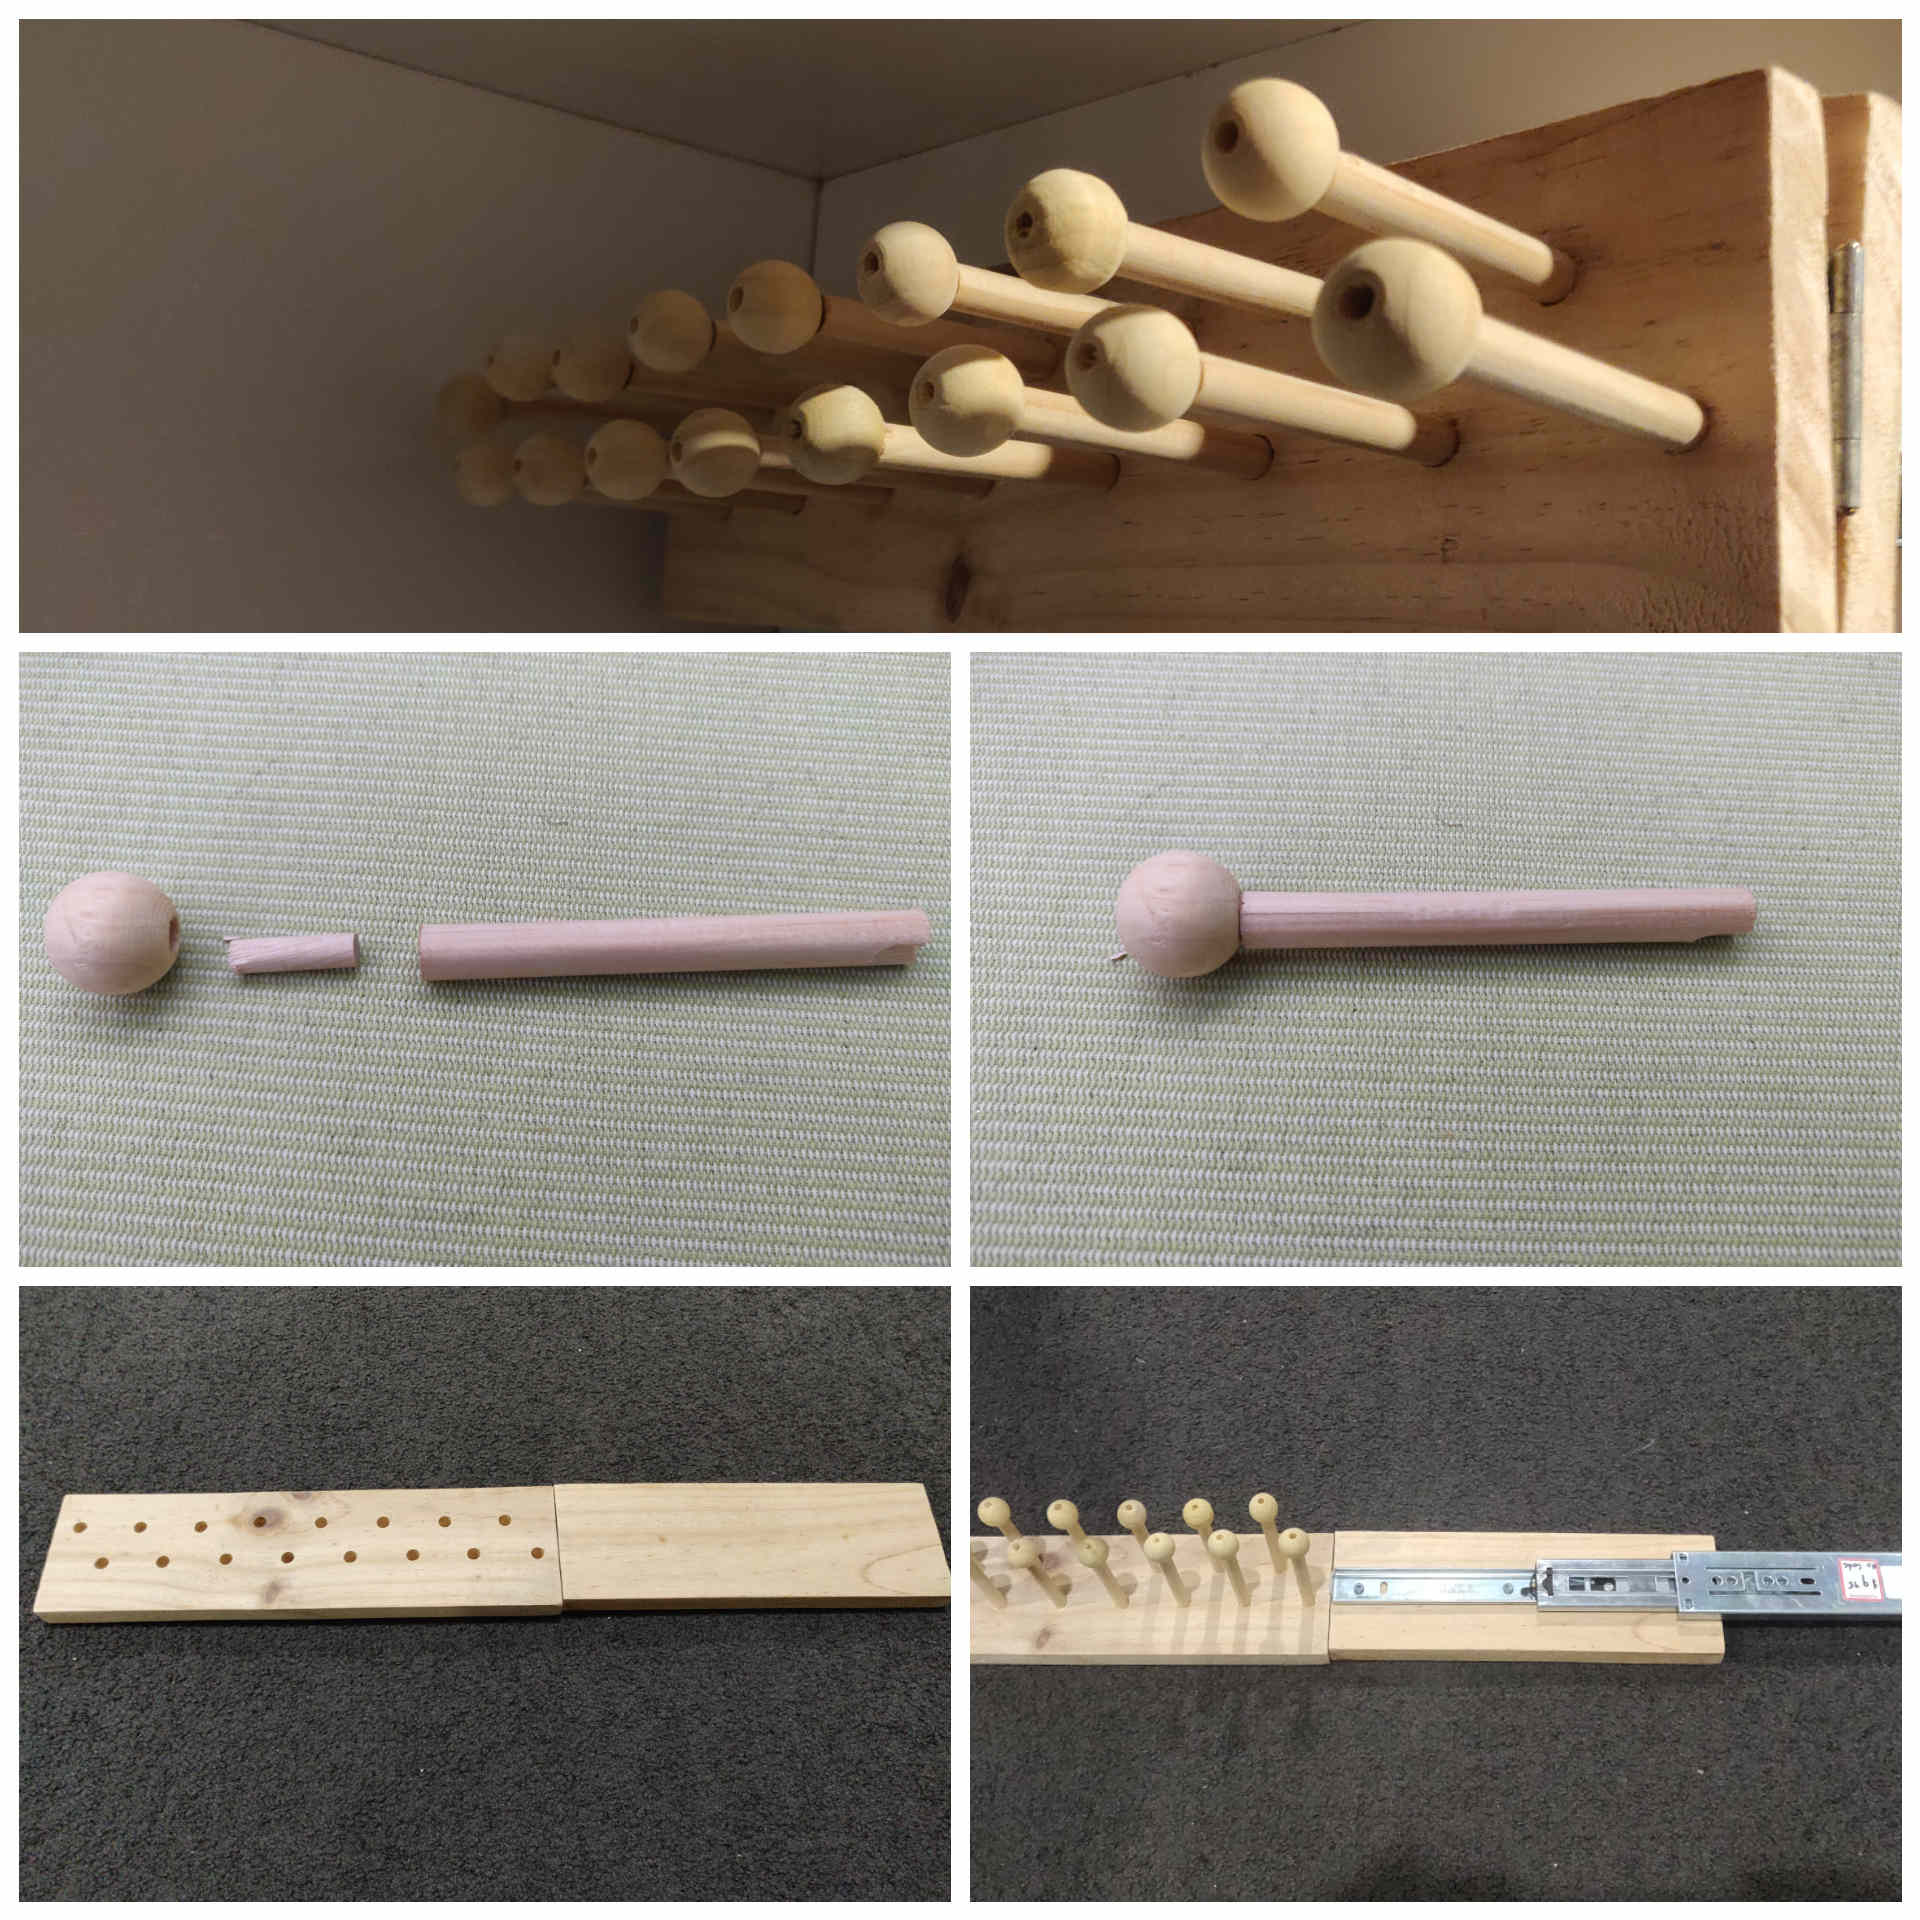
To make the rods to drape the ties, I used the wooden beads and the two widths of wooden dowels. I widened the holes in the wooden beads for the smaller diameter dowel to fit into, and also drilled out the centre of the larger dowel for the smaller diameter dowel to fit into.
The wooden plank was cut into two pieces and joined with the hinge. Holes were drilled into one of the wooden planks for the tie rods to insert into. The ball bearing runner was attached to the wardrobe wall, before finally attaching the tie rack to the runner.
There was just enough space for two rows of 8 rods, which was just enough for my 16 ties. When my tie collection grows, I will need to construct another storage rack.
UPDATE
Project Date: July 2020
I purchased more ties, and therefore, storage rack number 2 was created. I wanted something different this time, and inspired by Pinterest, I made a rotating tie rack. I wanted to make this completely out of wood (no screws etc. except for attaching it to a cabinet wall). Using bits of srap pallet wood, I started by cutting out a circle for which to attach the dowels for draping the ties over. Once this centre piece along with the tie rods was complete, I then constructed the rest of the unit to be able to rotate this centre piece. The central rod came from a length of left over dowelling, with both ends slightly tapered so that they could be hammered into the top and bottom pieces in order to secure the entire unit without any screws. The result can be seen in the picture below, and it has room for 14 ties.